Master Bedroom Furniture Set
Master studio portraits: set up a studio today!
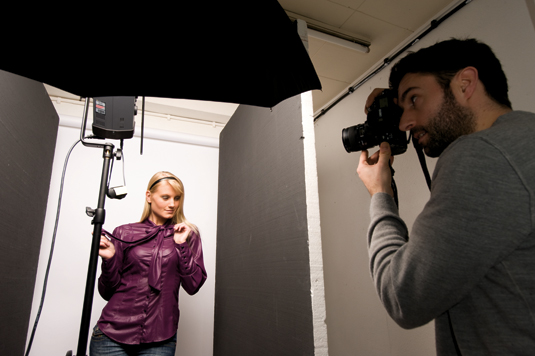
As a designer, likely working in a small studio space, the thought of getting started with studio portrait photography – with the lights and various equipment that comes with the territory – can seem a scary prospect. But relax, the kit you need has become much cheaper and easier to use, and you may not need to hire an external photographer.
The appeal of an in-house studio, especially for portraits, is that it gives you the ability to control a shoot – you can decide which studio accessories you use, and where you place them. And it's entirely up to you what kit you buy, and how much money you set aside for the task in hand.
Read more about portraits via our guide to everything you need to know about portrait photography.
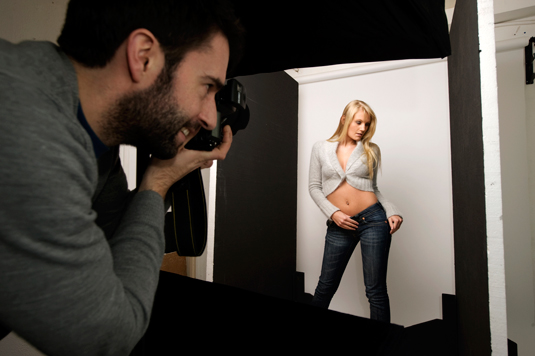
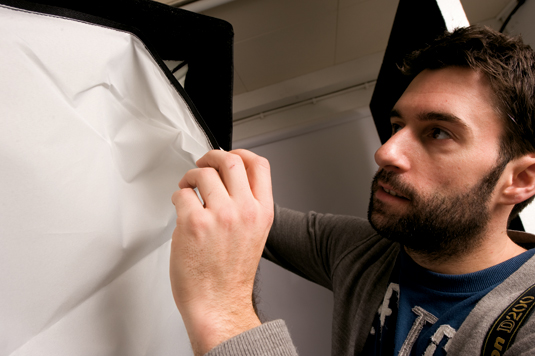
The beauty of a studio set up is the flexibility. You can opt for a cheaper option and produce great shots with a large polystyrene board as a reflector, or you can chuck a bit more cash at a life-size softbox. It's down to you and your budget.
Getting started won't break the bank
Presuming you're eager to save money, and why wouldn't you be, basic 'two head' home-studio starter kits – such as those made by Interfit – can be purchased for as little as £250. These set-ups are perfect for getting started with studio portrait photography, and are a cinch to use. These cheaper kits even come with added accessories like a silver umbrella for bouncing light or softbox for diffusing it – ideal for headshots, full-length shots and group portraits.
Get exposure right every time
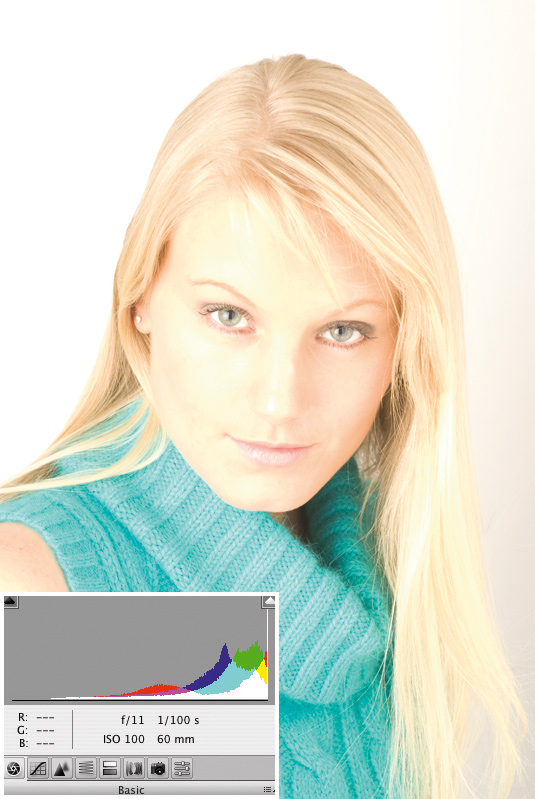
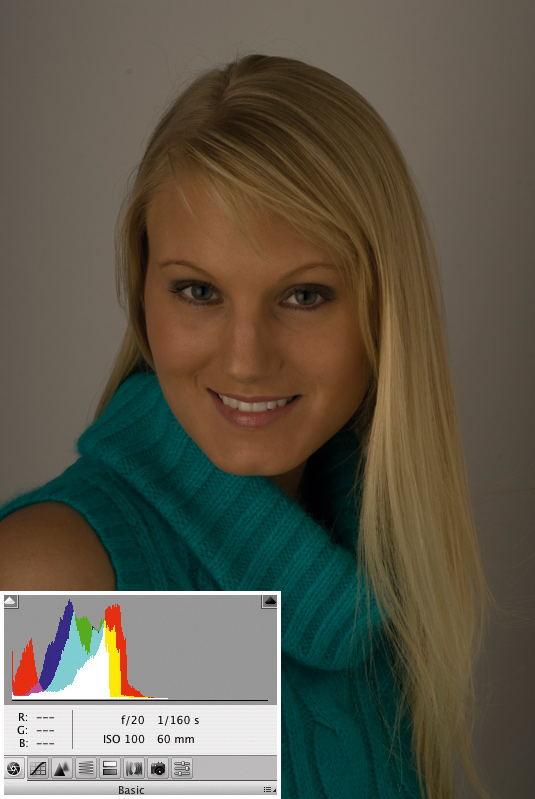
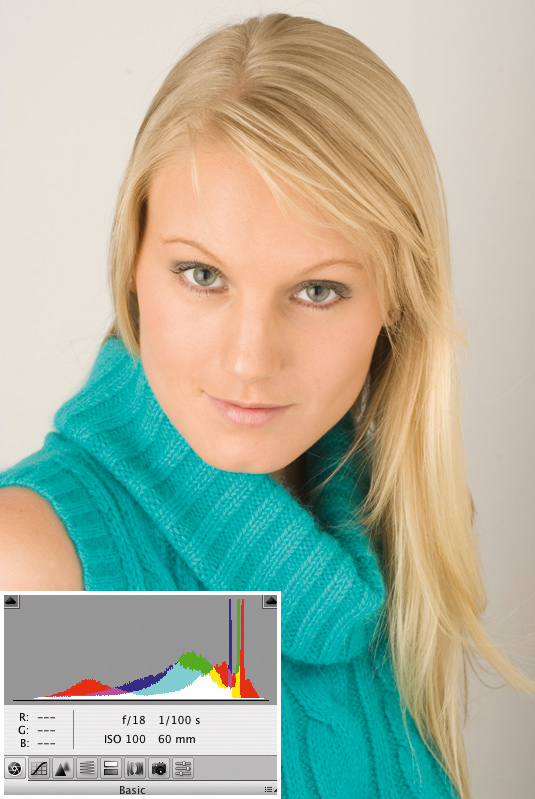
Newcomers to studio portrait photography often worry about how to get a correct exposure from a flash source. The tried-and-tested method for taking a reading is to use a handheld light meter, but you don't have to resort to this rather old-school solution.
The histogram (exposure chart) that you can call up on your camera's LCD screen is ideal for checking and altering your exposure. Just make sure that the tonal distribution is balanced throughout the graph.
Opening or closing the aperture is the best way of solving exposure issues, or try increasing or decreasing the power output of your flash unit to compensate for under or overexposure. Check out these examples.
Overexposed
Underexposed
Correct exposure
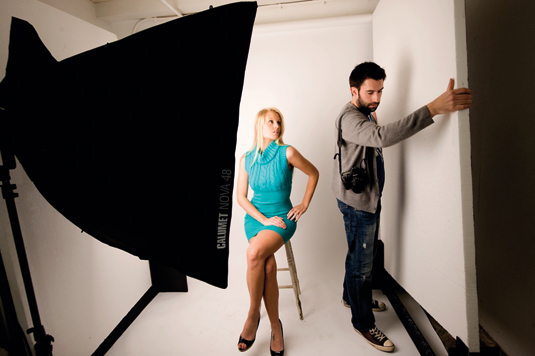
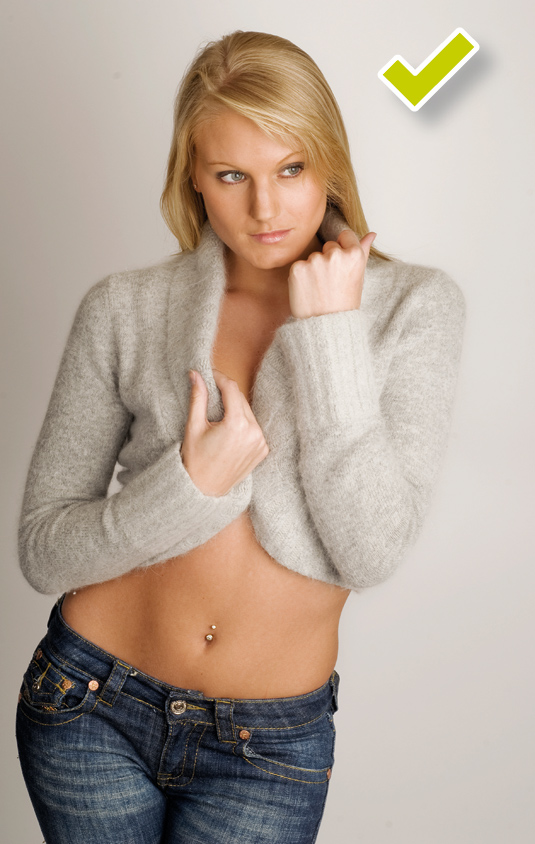
Add some drama
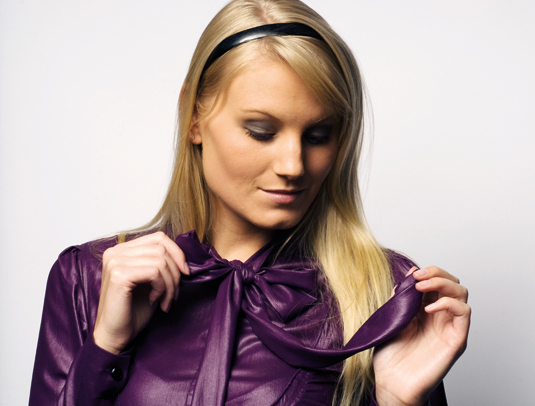
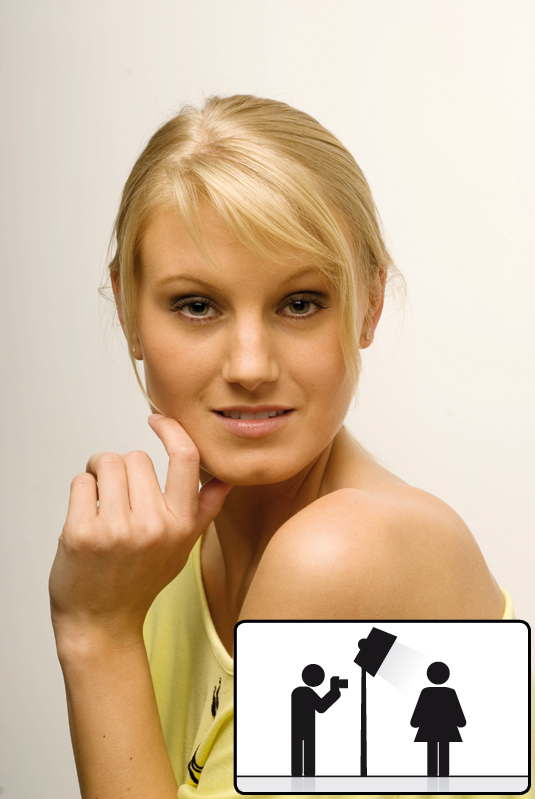
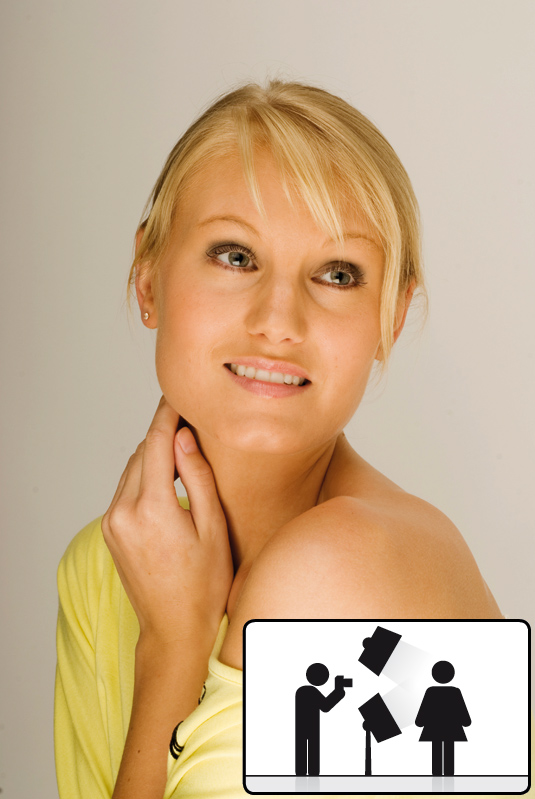
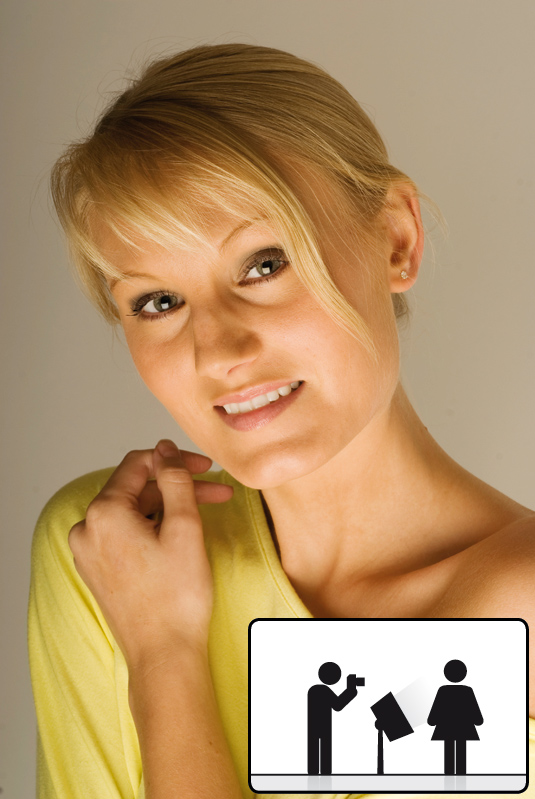
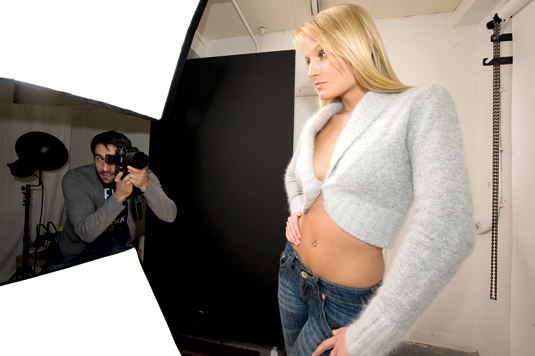
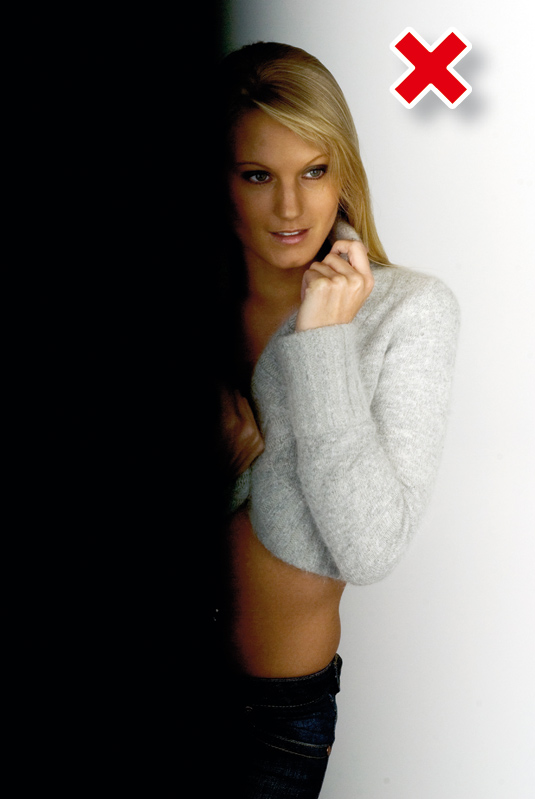
Most entry-level studio kits come with a reflective umbrella. This is a very useful accessory, and you'll often see two placed either side of the model for a soft, even, and flattering coverage of light. For the shot above, however, we opted for a hard-lit, punchy effect by placing the umbrella high and to the left of the camera. Facing it down towards the side of the model's face meant that only one side received direct exposure to the light. We made the other side even darker by placing a black polystyrene board to the model's right (see below).
The perfect camera setup
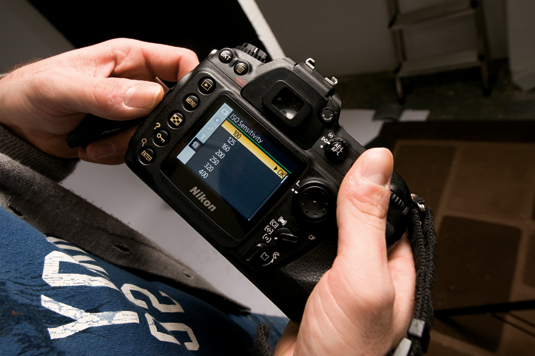
There are no fixed rules for setting your camera up for studio portrait photography, but there are settings that will ensure better quality shots. To begin with, a good tip is to choose the lowest ISO setting on your camera; this will keep digital noise to a minimum.
Next, set the White Balance to Flash to ensure punchy but accurate colours and tones. It's best to shoot in Manual mode, as this enables you to specify both shutter speed and aperture, rather than relying on the camera to work it out for you.
Finally, shoot in RAW – even though you are using the on-screen histogram to read the exposure, it's still possible to blow-out certain areas very slightly.
Shooting in RAW gives you the flexibility to use image-editing software, such as Photoshop CS6, to rescue blown-out highlights – a common problem when shooting blonde models.
Softbox positioning
Where you place your softbox – or multiple lights, if you've decided to spend a little more on your setup – will have a huge effect on the success of your studio portrait photography. In the examples below, we've shown you how a portrait shot can differ depending on your lighting position.
Single softbox above the subject
Two softboxes – one above, one below
A single softbox underneath
Essential accessories
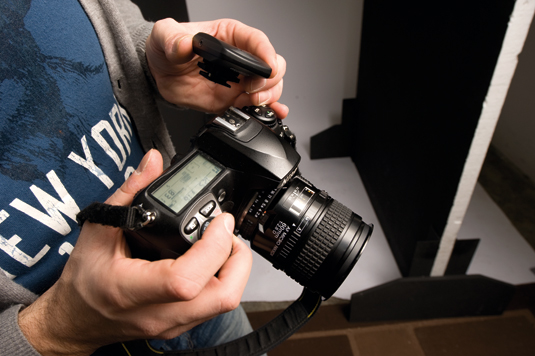
One of the most useful tools for any studio portrait photography is a wireless flash trigger, which you can use to fire your flash heads remotely. Simply fit the flash with a receiver, attach your trigger to the hotshoe on top of your camera, and now you can shoot without worrying about cables or pulling a flash head over.
A large softbox is also recommended for studio portrait photography – this versatile piece of kit can be used to create a number of different and dramatic lighting effects. But don't just plonk it in front of your model and fire away with it stuck in one position. Take a few frames, then move it around, side to side and from high to low. You can even try placing the softbox to one side of your model to cast dramatic shadows across their face.
Understanding flash sync
Despite leaving it until the last part of our feature, getting your head around flash sync is vital if you hope to master studio portrait photography. In simple terms, if you choose a shutter speed faster than that of the camera's maximum flash sync speed, you'll end up with a wide black band across your portrait. This band is the camera's shutter curtain, captured as it closes on the exposure.
Obviously this is something you want to avoid, and you can do this by decreasing the shutter speed to within the camera's flash sync speed setting. Most modern D-SLRs have flash sync speeds of around 1/200 sec, and a few have speeds as high as 1/500 sec. Below you can see the right and wrong way to do it.
Getting flash sync right
And completely messing it up
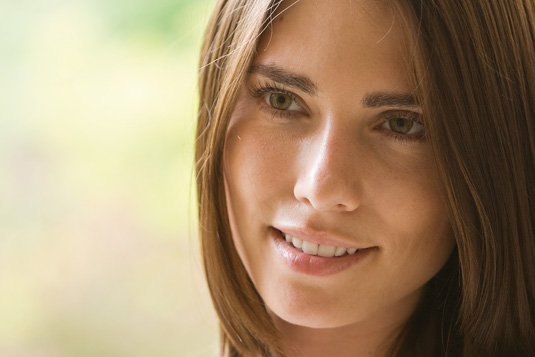
10 tips for better portrait photography
You've got the basics down, the correct equipment and just the right studio space but something's still not quite right. Is it your choice of lens? Your model? Your compositions?
Take a look at these 10 quick tips for better portrait photography. You'll be snapping that perfect shot in no time!
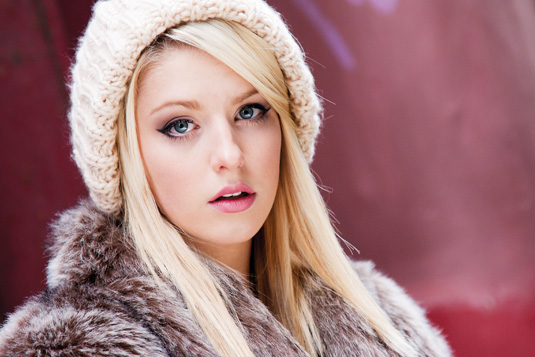
Lens choice
Your choice of lens has a big impact on your portrait photos. A wide-angle (around 18mm) lens captures a wider angle of view, so more of your subject's surroundings will be in shot. A telephoto (over 70mm) lens captures a narrower angle of view, and less of your subject's surroundings will appear in frame.
Focal length also affects depth of field (DoF). A wide-angle lens will capture more depth of field compared to a telephoto lens. This is why telephoto lenses are favoured over wide-angle lenses for portraits, as it further knocks backgrounds out of focus to make people more prominent in the scene.
Exposure Compensation
A common problem when photographing people with light skin tones is underexposed portraits. To brighten up your subjects, and when using Av mode (see Tip 3), you can use Exposure Compensation. Try dialling in up to +1 stop of positive Exposure Compensation to lighten up people's faces.
Aperture
When shooting portraits, it's best to set a wide aperture (around f/3.5-f/5.6) to capture a shallow depth of field – so the background behind your subject is nicely blurred, making them stand out better.
Shoot in Av (Aperture Priority) mode to control depth of field, in this mode your D-SLR will helpfully set the shutter speed for a good exposure. Specialist portrait lenses tend to have even wider maximum apertures (from f/1.4 to f/2.8) in order to blur backgrounds further.
Shutter speed settings
When setting your shutter speed, remember to factor in your lens's focal length, otherwise camera-shake (and blurred results) will become an issue. As a general rule, make sure your shutter speed is higher than your effective focal length.
For example, at 200mm use a 1/250sec shutter speed or faster. This also means you can get away with slower shutter speeds when using a wide-angle lens – such as 1/20sec with an 18mm focal length.
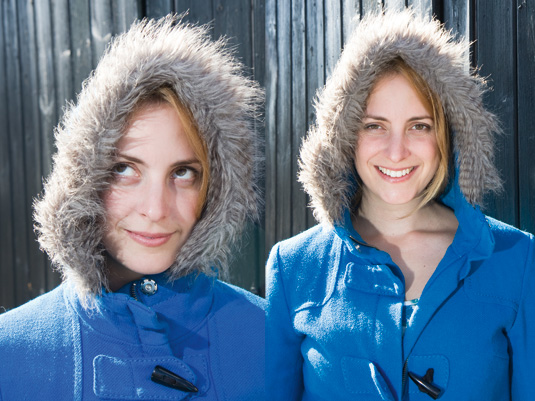
Building a rapport
- Try to connect with subjects – it's essential for great portraits.
- Have fun when taking portraits – keep the mood upbeat.
- If you smile, your subjects will smile too!
- Show your subjects your shots to reassure them they look good.
- Don't be afraid to give plenty of direction, telling your models how to look and pose.
Fast shutter for people pics
People tend to blink and move around a lot. To avoid motion blur appearing, you'll need to use a fast shutter speed. This will also help to ensure sharp shots and avoid camera-shake as you'll be shooting portraits handheld, more often than not.
While in Av mode and maintaining a wide aperture, to increase your shutter speed, simply increase your ISO (from ISO100 to ISO400, say). In low light (indoors and outside), you may need to increase it to ISO800, 1600 or even 3200! A little grain is infinitely better than a blurry, useless photo.
Focusing
With tightly composed photos, focus on the eyes; with wider compositions, focus on the head. To help with pinpoint focusing, manually select a single autofocus (AF) point. The tried-and-tested pro technique is to set the central AF point, half-press the shutter button to focus on the eyes/head, then recompose to position them off to one side before fully pressing the button.
Alternatively, set AF points in the top corners and position them over your subject's eyes/head and take your shot. Either way will help you to position your subjects off-centre for a more attractive and dynamic composition.
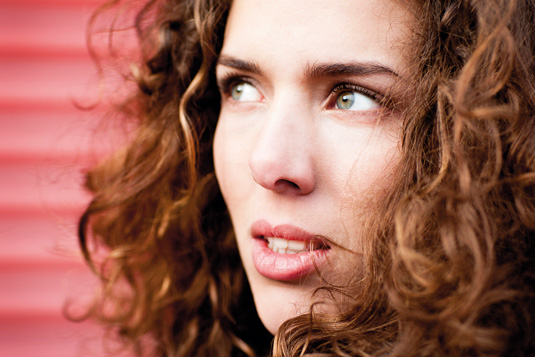
Posing
How your subjects stand, pose and look will have a dramatic affect on your results. A slight change in facial expression – such as whether they smile or not – can radically change the entire feel of the photo.
When shooting, try and capture a range of expressions so you can pick which you prefer when back on the computer. Also consider setting up portrait shots when your subject looks off-camera, up or down, or to one side. Play around and see what works!
Compositions
Be creative with your compositions. Zoom in instead to fill frame for a more inspired composition. Positioning your subject to one side of the frame, with 'space to look into', is a great technique to master.
Also, why not try experimenting with wide apertures to capture a very shallow depth of field. But remember to make sure your focusing is precise – with our example shot at f/2.8, we focused on the model's left eye, this has meant her right eye is dropping out of focus.
Ideal portrait lenses
- Nikon AF 50mm f/1.4
- Canon EF 50mm f/1.4 USM
- Nikon 85mm f/1.8D
- Canon EF 100mm f/2 USM
- Tamron SP 17-50mm f/2.8 XR Di II VC
- Sigma 70-200mm f/2.8 EX DG OS HSM
And that's it! We hope that this feature has explained some of the basics of getting started with studio portrait photography. Happy shooting!
Related articles
Source: https://www.creativebloq.com/photography/master-studio-portrait-photography-912865


0 Komentar